Installing Python (optional)#
This chapter provides instructions on how to install Python on your personal computer.
Installing Python on your device is optional. All class exercises can be completed using the university’s workstations. However, installing Python on your own device allows you to work on exercises at home and can be a valuable learning experience.
There are multiple ways to install Python on your computer. While most methods work, some are more practical than others. Unless you are experienced with Python installations (i.e., you have done this before), please follow these instructions carefully.
What to do if you already have python installed on your laptop
If you already have Anaconda, Conda, or Miniconda installed from a previous class:
You can keep your installation if it works for you. If you’d prefer to start fresh, uninstall Anaconda first and follow the instructions below.
For Windows 10 or below or Chromebook users
Do not attempt to install Python on a Windows 7 or 8 computer. This operating systems are no longer supported. You can use the university’s workstations for the exercises instead.
Windows 10 will no longer be supported after October 25. While it’s possible that Python will continue to work on Win 10 for a while, I recommend to update your operating system as soon as possible still.
Installing Python on a Chromebook is not straightforward, and I cannot provide support for this. You can still use the university’s workstations to complete the exercises.
Install Miniconda#
We will use an installation option with a minimal footprint on your computer: Miniforge
Download the Windows installer amd double-click the .exe file to execute it.
Follow the prompts, taking note of the options to “Create start menu shortcuts” and “Add Miniforge3 to my PATH environment variable”. I’d recommend you to not add Miniforge3 to the PATH environment variable, as it can cause conflicts with other software (it is ticked off per default). Without Miniforge3 on the path, the most convenient way to use the installed software (such as commands conda and mamba) will be via the “Miniforge Prompt” installed to the start menu (see Testing your installation below).
Important! About the installation location
Choose a folder located in where there is enough space available, for example in your user directory (e.g. C:\Users\yourname\Miniforge3). Do not install in a folder with special characters in the name (e.g. french accents), as this can cause issues with conda.
For these platforms, no need to download the files yourself, but you need to run a script. See the instructions here.
Testing your installation#
To see if everything worked well, open a terminal prompt.
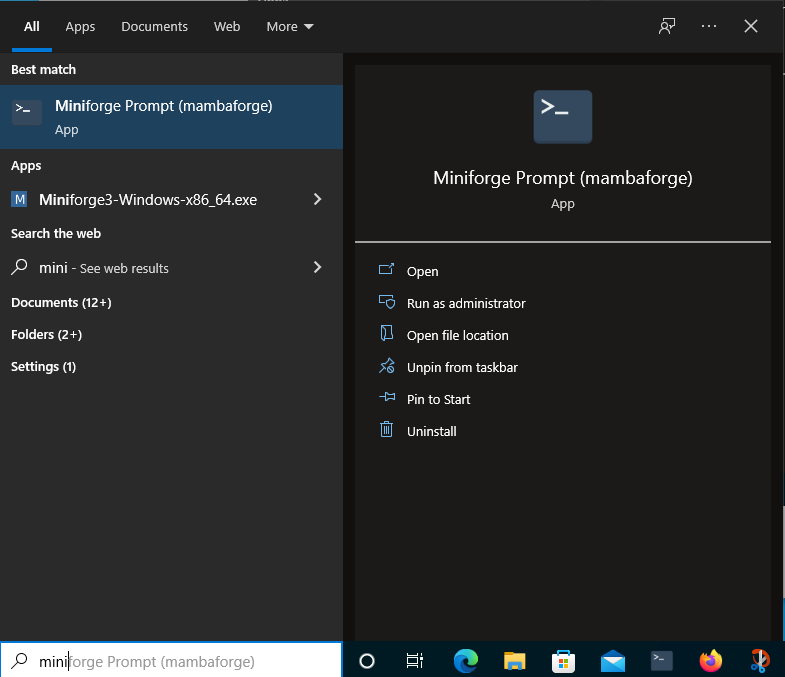
On Windows, open the miniforge prompt (from the Start menu, search for and open “miniforge prompt”):
The prompt you opened should display a line like this:
(base) C:\Windows\System32>
For these platforms, the terminal is available by default. You can open it by searching for “terminal” in the search bar.
Now you should have a terminal window open. In the terminal, type:
conda list
You should see a long list of package names.
If you type:
python
A new python prompt should appear, with something like:
Python 3.12.7 | packaged by Anaconda, Inc. | (main, Oct  4 2024, 13:17:27) [MSC v.1929 64 bit (AMD64)] on win32
Type "help", "copyright", "credits" or "license" for more information.
>>>
You can type exit() to get out of the python interpreter.
Optional: a brief explanation of what we’ve just done
The steps above should work in nearly all situations and prepare you for the class. Here’s a brief explanation in case you’re curious or need to search for more information:
We installed Miniconda, a minimal installer for the larger Anaconda project. Anaconda is a scientific Python distribution, but it includes more tools than you will ever need and is very heavy.
Additionally, we made some default configurations:
We set Conda-Forge as the default channel for downloading Python packages (instead of the default Anaconda channel).
We replaced
condawith Mamba as the default package manager.mamba installworks the same way asconda installbut is significantly faster.
Learning checklist#